

LOTION BARS
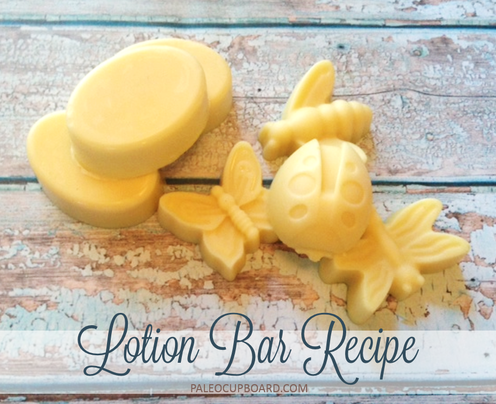
Lotion bars are easy to make and are a healthy alternative to chemical-filled store bought lotions. With just a few simple ingredients you can make your own bars that you can keep for yourself or share with friends.
There are a wide variety of
shapes and sizes that you can choose from, and you can even make seasonal or holiday themed bars. These are great to give as gifts and are also handy for traveling or keeping in your gym bag. I like to keep one in a resealable plastic bag in my purse so I can use it when I am out and about. You can also try different ratios of wax and oils until you find the one that works best for you.
A little goes a long way with these bars and they are great when used on freshly cleaned skin that has just been patted dry. Rub the bar gently onto your skin and then massage the lotion in with your hands. The warmth from your hands will help melt the lotion and let it sink into your skin. It may feel a little greasy for a minute or two, but after that your skin will be left feeling soft and supple (and if you use essential oils, your skin will also smell amazing for hours). The amounts below are enough to make about 12 large lotion bars.
Remember: What you put ON your body is just as important as what you put IN it.

Please note that all content and images are the intellectual property of Paleo Cupboard and they may not be copied or distributed without consent. Please feel free to print for personal use!
Homemade Lotion Bars
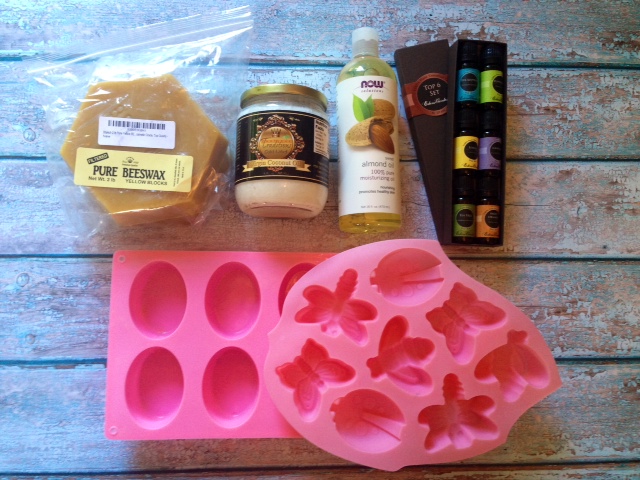
What You Will Need:
- 1 cup beesewax
- 1 cup coconut oil
- 1 cup almond oil
- Essential Oils (optional)
- Soap molds
- Measuring cup
- Bowl
- Saucepan with water
- Stirring spoon
- Toothpick or something small to stir with
- 1 cup beesewax
- 1 cup coconut oil
- 1 cup almond oil
- Essential Oils (optional)
- Soap molds
- Measuring cup
- Bowl
- Saucepan with water
- Stirring spoon
- Toothpick or something small to stir with
How To Do It:
1. Fill a medium-sized saucepan about halfway full of water and place on the stove over medium-low heat. Bring the water to a light boil. Place a bowl or pot over the saucepan to create a double boiler (the wax can be a little hard to remove so I use an older metal bowl that I reserve for these types of things). Add your beesewax to the bowl and allow it to melt. If your beesewax is in a large block, add the block to the bowl and allow enough to melt to make 1 cup. Remove the rest of the block and set it aside to cool.
2. Add the coconut oil and almond oil to the bowl and allow the oils and wax to melt together, stirring gently. Once combined, pour the oil mixture into the molds (or use a spoon to spoon it in). If the oil starts to harden while you are pouring you can just return it to the heat for a few seconds until it is melted again.
3. If you are using essential oils, you can add about 2-5 drops of your favorite scent into each mold (depending on how strong you want the scent to be) and stir each gently with a toothpick to combine. I like to use a different scent in each mold or even combine different essential oils to make new scents (lavender and orange is one of my favorite combinations).
4. Set the molds aside and allow them to cool completely. I usually let mine set for about 6 hours or leave them overnight. The tops will start to harden rather quickly (as in the picture below), but they will not be fully set for a few hours.

5. Once cooled, pop them out of the molds and store them in a cool place not in direct sunlight (I like to display mine in pretty glass jars). Enjoy!
Check Out My Cookbook!

My Favorite Products